Tolerances and Conformity



Thermometers
AM8060 twin channel thermometer – displays both probes simultaneously plus Channel 1 minus Channel 2. This unit is ideal to perform calibration bath surveys and when testing more than one item at a time. It’s also ideal as you can characterise 1 channel with a top of the range SPRT probe and the other channel with a working Secondary SPRT probe.
The AM8060 works with 100 ohm or 25 ohm probes or a combination of the two.
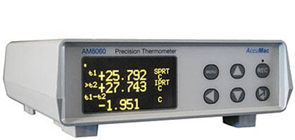
The AM8040 is a cheaper option than the AM8060 as its single channel.
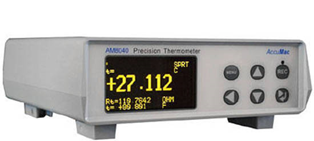
Both the above thermometers are ideal for a secondary lab – a true 3 decimal resolution. Easy to use and affordable. Connection is via gold plated copper spade plugs which require careful use but do provide less resistance.
Probes
Resistance thermometers are classified as
- Standard Platinum Resistance Thermometers – or SPRTs these are the best you can buy and suitable for Primary Laboratory use
- Secondary SPRTs - suitable as working thermometers for Primary Labs or reference probes in Industrial Labs
- Secondary Reference PRTS – suitable as reference or working thermometers in industrial labs
- Precision Industrial PRTS – good quality PRTs for industrial use
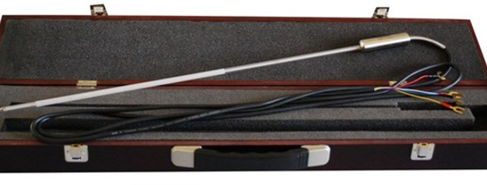
AccuMac make some of the best probes in the world. They continue to provide probes to Primary labs worldwide – e.g. PTB (Germany National Metrology Lab), MSL of New Zealand and the Nepal National Metrology Lab.
Many Primary labs would use a thermometry bridge (6-10 decimal places) with their probes rather than an instrument like the AM8060. The AM8060 is fabulous for a secondary lab.
AccuMac make both 100 and 25 ohm probes in various diameters, lengths and sheaths.
If what Teltherm quotes doesn’t suit let us know and we can get you prices for other options.
Some info re temperature probes that may help you with your choice.
ITS-90 requires that the SPRT/PRT has W(Ga)>=1.11807?
- What is W(Ga)? W(Ga)=R(Ga)/R(TPW) - is the ratio of PRT resistance value at the Gallium melting point (29.765 °C) divided by resistance value at the triple point of water (0.01 C); W(Ga) reflects the purity of the platinum wire.
- The ITS-90 curve is built based on high purity reference grade platinum wire. So to use the ITS-90 formula and minimize deviations from the reference curve for your probe & thermometer, a SPRT/PRT must be made from reference grade platinum wire.
- ITS-90 has defined W(Ga)>=1.11807 as the requirement for PRTs to be able to fit in the curve.
- In general, a 25 ohm PRT is more stable than a 100 ohm PRT, which is more stable than a 200 ohm PRT. The reason is simple, the smaller the resistance, the thicker the platinum wires. Thinner platinum wires are vulnerable to mechanical shocks, contamination and oxidization etc. factors that affect SPRT/PRT performance.
- Some manufacturers use 200 ohm probes - The advantage of using 200 ohm PRT is resolution, or sensitivity. For every 0.001 ohm resistance change, the corresponding temperature changes are 10 mK, 2.5 mK and 1.25 mK for 25 ohm PRT, 100 ohm PRT and 200 ohm PRT respectively. But 200 ohm probes are not as stable.
- So using a 200 ohm PRT can compensate (somewhat) for the shortcomings of a readout, if the readout is not very sensitive. An opposite example is all National or Primary Labs (NIST etc) will only use 25 ohm SPRTs because their readouts (thermometry bridges which cost $30K above) are very good (6-10 decimal places) so they only want to use stable SPRTs.
Explaining Sensitivity
All the PRT readouts read a PRT’s resistance value and converts that value to temperature based on the ITS-90 formula or CVD formula etc.
We say 100 ohm SPRTs are more sensitive, which means they have a better resolution for the same amount of temperature change.
For example, for roughly every 1 °C change in temperature, the 100 ohm SPRT will have a 0.4 ohm change in resistance, while a 25 ohm SPRT will only have a 0.1 ohm change in resistance.
So the resistance value changes 4 times larger from a 100 ohm SPRT than that from a 25 ohm SPRT, thus the PRT can produce more refined readings (better resolution), hence more sensitive.
This is not a factor in many calibration labs as the readouts such as Thermometry Bridge etc. can read resistance up to 6-10 decimal places. But it can be an issue for commercial users or field users where the readouts are not as advanced - you often see primary labs use 25 ohm SPRTs but you rarely see anything below 100 ohm from an industrial user.
One clear advantage of 25 ohm SPRT is stability, which means they are more durable and stable over time. This is because 25 ohm SPRTs use thicker/bigger platinum wires to construct the sensing element than compared to 100 ohm SPRTs.
Thicker/bigger wires are more shock resistant, and hence more stable.
Because AccuMac are a PRT manufacturer, they know the intricacies to balance performance and stability.
Primary Laboratories
We recommend the following probes
AM1880 bird cage design (inconel sheath)
AM1900 (quartz sheath)
AM1800 series (inconel sheath)
AM1968 Platinum Capsule SPRT for cryogenic work (-260°C to 232 °C).
Industrial users
We recommend the following thermometers:
AM8060
We recommend the following probes:
AM1850-25 – use as a reference if you have the budget
AM1760 series – great working SPRT probes
AM1750 series – affordable secondary reference PRTS
